
Note: It may be helpful to print out these instructions before you start to replace the secondary transfer roller.
| Figure | Step |
|---|---|
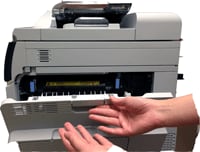
Figure 1: Open the right door
|
1. Open the right door. This will partially lower the secondary transfer assembly.
CAUTION: Do not touch the spongy roller surface unless you are replacing the roller. Skin oils on the roller can cause image quality problems. |
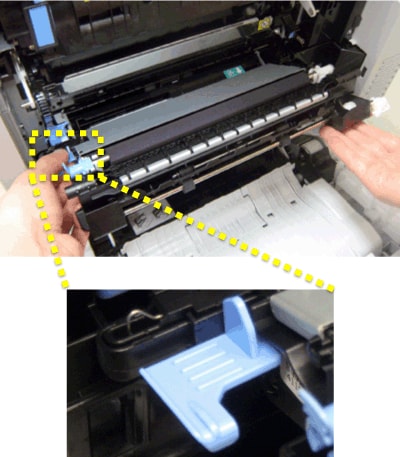
Figure 2: Lower the secondary transfer roller assembly
|
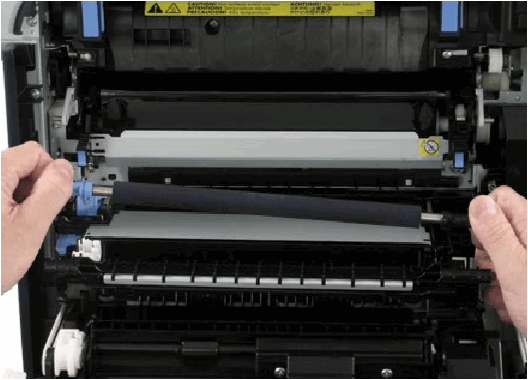
2. Push down on the blue lever as shown in Figure 2 to fully lower the secondary transfer assembly, and reveal the secondary transfer roller, as shown below.
|
Figure 3: Grasp the blue handle
|
3. Grasp the blue handle on the secondary transfer roller and lift it up, as shown in Figure 3. |
Figure 4: Grasp the black gear
|
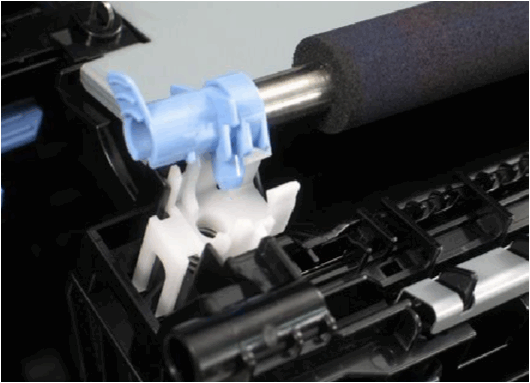
4. Grasp the black gear at the other end of the secondary transfer roller and lift it up, as shown in Figure 4. |
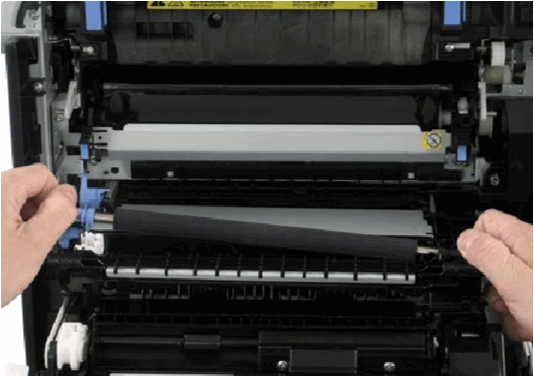
Figure 5: Put the secondary transfer roller on a clean surface
|
5. Grasp the two ends of the secondary transfer roller, and carefully take it out of the printer. Put the secondary transfer roller on a flat clean surface, in a safe and protected location. |
Figure 6: Unpack the new secondary transfer roller
|
6. Unpack the new secondary transfer roller from its protective bag, and put it on a flat clean surface in a safe and protected location. CAUTION: Do not touch the black surface of the secondary transfer roller, or place anything on it. This may damage the roller and cause print quality problems. NOTE: Follow the instructions that came with the new secondary transfer roller assembly kit to recycle the used secondary transfer roller. |
Figure 7: Align the secondary transfer roller with its slot
|
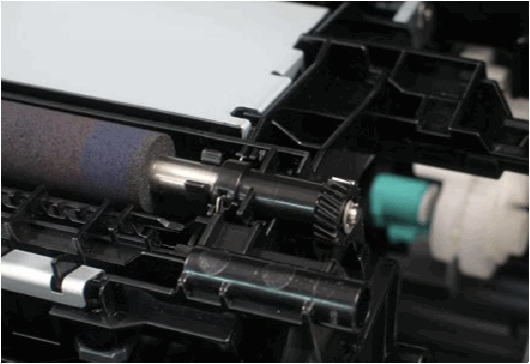
7. Align the secondary transfer roller with its slot. Place the blue side in first. With the pin facing down, as shown in Figure 7, gently press the blue side in until it clicks into place. |
Figure 8: Place the black side in
|
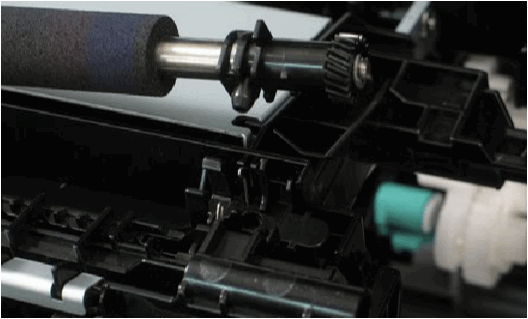
8. Rotate the black gear until its pin faces down, as shown in Figure 8. Press it in until it clicks into place. |
Figure 9: Close the right door
|
9. Lift up the right door until it clicks into place. This will also lift the secondary transfer roller assembly to the position in which it is fully engaged. |


![]()
Please let HP know if this helped you to resolve your issue, and help HP improve service.
![]()