
Note: It may be helpful to print out these instructions before you start to reseat the formatter.
| Figure | Step |
|---|---|
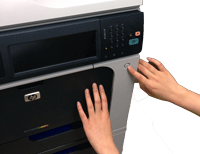
Figure 1: Turn the Printer off
|
1. Turn the printer off. |
Figure 2: Disconnect the Cables
|
2. Disconnect all cables and USB devices connected to the formatter, pull out the EIO card (if installed), and unplug the power cord. Note: Before disconnecting the cables, be sure to know where they are connected, so you will be able to reconnected them later. |
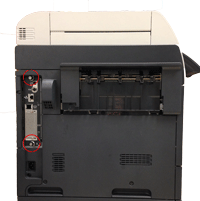
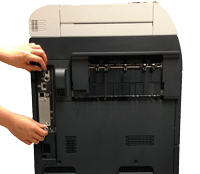
Figure 3: Locate the Thumb Screws
|
3. Locate the thumb screws at the top and bottom of the formatter. |
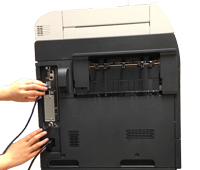
Figure 4: Loosen the Thumb Screws
|
4. Loosen the thumb screws at the top and bottom of the formatter. |
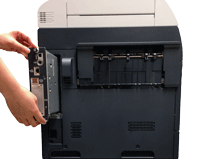
Figure 5: Release the Formatter
|
5. Grasp the thumb screws at the top and bottom of the formatter and pull it toward yourself to release the formatter from its slot. Note: Just pull the formatter out of the printer a couple of inches. You do not need to pull the formatter all the way out. |
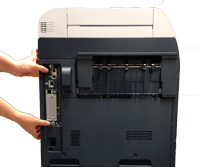
Figure 6: Insert the Formatter
|
6. Push the formatter firmly into its slot until it clicks into place. |
Figure 7: Tighten the Thumb Screws
|
7. Tighten the thumb screws at the top and bottom of the formatter. |
Figure 8: Reconnect the Cables
|
8. Reconnect the power cable, interface cables, and any USB devices or EIO card. |
Figure 9: Turn the Printer on
|
9. Turn the printer on. |


![]()
Please let HP know if this helped you to resolve your issue, and help HP improve service.
![]()