
Note: It may be helpful to print out these instructions before you start to reinsert the transfer unit.
| Figure | Step |
|---|---|
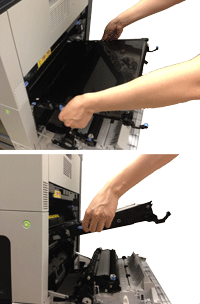
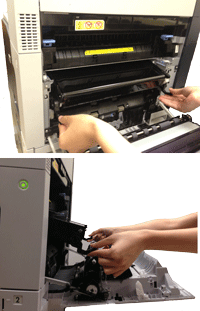
Figure 1: Grasp the large blue handles and align the transfer unit with its slot
|
1. Grasp the transfer unit at the locations of large blue handles on both sides of the transfer unit, as shown in Figure 1. Align the transfer unit with its slot. CAUTION: Only push on the side handles of the transfer unit as indicated. Do not touch the shiny black surface of the belt on the top of the transfer unit, or place anything on it. This may damage the transfer unit and cause print quality problems. |
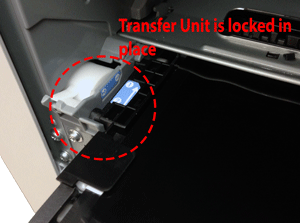
Figure 2: Lock the transfer unit
|
2. Gently push it a little bit into the slot until the transfer unit can hold itself. It should slide in easily. CAUTION: Make sure the transfer unit is locked and holds itself.
|
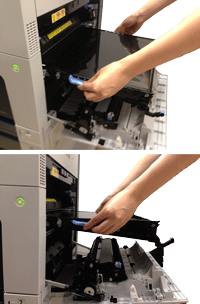
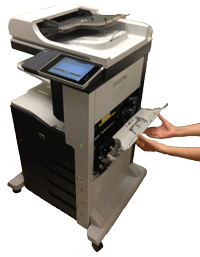
Figure 3: Switch your hands
|
3. Switch your hands to the blue handles as shown in Firugre 3. CAUTION: Only touch the handles on the front of the transfer unit as indicated. Do not touch the shiny black surface of the belt on the top or front of the transfer unit, or place anything on it. This may damage the transfer unit and cause print quality problems. |
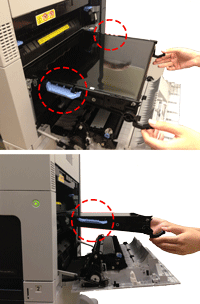
Figure 4: Insert the transfer unit
|
4. Gently finish inserting the transfer unit while maintaining its alignment with the slot in the printer, until it clicks into place. It should slide in easily. CAUTION: Only touch the handles on the front of the transfer unit as indicated. Do not touch the shiny black surface of the belt on the top or front of the transfer unit, or place anything on it. This may damage the transfer unit and cause print quality problems. |
Figure 5: Close the right door
|
5. Lift up the right door until it clicks into place. This will also lift the secondary transfer assembly to the position in which it is fully engaged. |
![]()
Please let HP know if this helped you to resolve your issue, and help HP improve service.
![]()