Thank you for visiting the AUSTRALIA HP Store
-
Contact Us
CONTACT USCall us
- Sales
- 1300 540 516
- Technical support
- 13 23 47
Exc. public holidays
Chat with us- Our specialist are here to help
- Live Product Demo
- Sales
- 61288061500 (WhatsApp)
-

- Post Sales
- 61288061700(WhatsApp)
Exc. public holidays
Live product demo
Submit feedback We value your opinion! - My Account
Search
Booting from USB Windows 10: A Comprehensive Guide

Posted:
September 12, 2024

G’day, tech enthusiasts! Whether you’re in Sydney, Melbourne, or the Outback, booting from a USB drive can be a lifesaver for various computing tasks. This comprehensive guide will walk you through the process of booting from a USB drive on Windows 11 PCs, tailored specifically for our Australian mates.
Contents
Understanding USB Booting
Before we dive into the nitty-gritty, let’s understand what USB booting is all about and why it’s useful for Aussie users.
What is USB Booting?
Booting from USB refers to starting your computer using software or an operating system stored on a USB drive instead of your computer’s main hard drive. This allows you to run different operating systems, recovery tools, or installation programs without affecting the data on your main drive.
Why Boot from USB?
There are several reasons you might want to boot from a USB drive:
- Installing a new operating system
- Running a live version of Linux without installation
- Using diagnostic and repair tools
- Recovering data from a non-booting system
- Updating BIOS or firmware
- Testing hardware components
- Installing Windows using bootable media
Now that we’ve covered the basics, let’s prepare your USB drive.
Preparing Your USB Drive
Choosing the Right USB Drive
When selecting a USB drive for booting, consider the following:
- Capacity: Choose a USB drive with at least 16GB of storage (32GB is recommended for most use cases).
- Speed: USB 3.0 or higher drives offer faster data transfer rates, which can be beneficial for bootable media.
- Reliability: Opt for a reputable brand to ensure the drive’s longevity and performance.
Creating a Bootable USB Drive
To create bootable media, you’ll need to use specific tools depending on your purpose:
- For Windows 11 installation:
- Use the official Windows Media Creation Tool from Microsoft
- Download it from the Microsoft website, select the ‘Create installation media’ option, and follow the on-screen instructions
- Use tools like Rufus, Etcher, or UNetbootin
- Download your chosen Linux ISO and use one of these tools to create the bootable USB
- Follow the instructions provided by the tool’s creator
- Many tools come with their own USB creation utilities
Remember to back up any important data on your USB drive before creating bootable media, as the process will erase all existing data on the drive.
Accessing BIOS/UEFI Settings
To boot from USB, you’ll need to change your computer’s boot order in the BIOS (Basic Input/Output System) or UEFI (Unified Extensible Firmware Interface) settings. Here are two methods to access these settings:
Method 1: Use Hotkey During Boot-up
- Restart your computer.
- As soon as the screen lights up, press the BIOS hotkey repeatedly. For HP computers, it’s typically F10 or Esc.
Method 2: Use Windows 11’s Start Menu
This method is useful if you can’t catch the BIOS hotkey during startup:
- Open the Start menu and click on “Settings” (or press Windows + I).
- Go to “System” > “Recovery”.
- Under “Advanced startup”, click “Restart now”.
- When your PC restarts, select “Troubleshoot” > “Advanced options” > “UEFI Firmware Settings”.
- Click “Restart” to enter BIOS/UEFI settings.
Changing Boot Order in BIOS/UEFI
Once you’ve accessed the BIOS/UEFI settings, follow these steps to change the boot order:
- Navigate to the “Boot” or “Boot Order” section using the arrow keys.
- Look for an option like “Boot Option Priorities” or “Boot Order”.
- Select the first boot option and press Enter.
- Choose “USB Storage”, “Removable Devices”, or the name of your specific USB drive.
- Move the USB boot option to the top of the boot order list.
- Save your changes and exit BIOS (usually by pressing F10 and confirming).
How to Boot from USB in Windows 11
Now that you’ve prepared your bootable USB drive and changed the boot order, you’re ready to boot from USB:
- Insert your prepared USB drive into a USB port.
- Restart your computer.
- If prompted, press any key to boot from the USB drive.
- Your computer should now boot from the USB drive.
The next steps will depend on what you’re using the bootable USB for:
- If installing Windows 11, follow the on-screen installation wizard.
- If running a Linux live environment, wait for it to load and then explore the OS.
- For diagnostic tools, follow the specific instructions for that tool.
Troubleshooting USB Boot Issues
If you’re having trouble booting from your USB drive, try these troubleshooting steps:
- Double-check the BIOS boot order to ensure USB is set as the first boot device.
- Try different USB ports on your computer, preferably USB 2.0 ports for older systems.
- Remove other USB devices that might be interfering with the boot process.
- Recreate the bootable USB drive using the correct ISO file in case of errors during the initial creation.
- Check if your USB drive is listed under a different name in the BIOS (e.g., “Removable Devices” or by the manufacturer’s name).
- Ensure your computer supports booting from USB (most modern PCs do, but some older models might not).
- If using UEFI, make sure Secure Boot is disabled in the BIOS settings.
- Try a different USB drive to rule out hardware issues.
Advanced USB Booting Techniques
For more advanced users, there are additional techniques you can explore:
Multi-boot USB Drives
You can create a single USB stick with multiple bootable operating systems or tools using software like YUMI or MultiBootUSB. This is useful for tech professionals who need access to various tools and OS environments.
Persistent Linux USB
When creating a Linux live USB, you can add persistence, which allows you to save changes and installed programs even after rebooting. This creates a portable, customizable Linux environment on your USB drive.
Network Booting (PXE)
Some environments use Preboot Execution Environment (PXE) to boot computers over a network. While not strictly USB booting, it’s a related concept that can be useful in enterprise settings.
Security Considerations
When booting from external media like USB drives, keep these security considerations in mind:
- Only use USB drives from trusted sources to avoid potential malware.
- Be cautious when making changes to your system through bootable media.
- Always back up important data before making significant system changes.
- Re-enable Secure Boot after you’re done if you disabled it for USB booting.
FAQs
Can I boot from USB on any Windows 11 PC?
Most modern Windows 11 PCs support USB booting. However, some older models might not have this capability. Check your computer’s specifications or manual to confirm.
Will booting from USB affect my existing Windows installation?
Generally, no. Booting from USB doesn’t change anything on your main hard drive unless you specifically choose to make changes (like installing a new OS).
How do I exit USB boot mode and return to my normal Windows 11?
Simply remove the USB drive and restart your computer. It should then boot from your main hard drive as usual.
Can I use any USB drive for booting?
While most USB drives will work, it’s best to use a reliable, brand-name drive with at least 16GB of storage for optimal performance.
Is it safe to boot from USB?
Booting from USB is safe as long as you use trusted sources for your bootable media and follow proper procedures. Always be cautious when making system changes.
Conclusion
Booting from a USB drive on Windows 11 can be a powerful tool for system recovery, OS installation, and trying out new software environments. By following this comprehensive guide, you should be able to successfully boot from your USB drive and accomplish a wide range of tasks.
Remember that the exact steps may vary slightly depending on your specific computer model and BIOS/UEFI version. Always consult your computer’s manual or manufacturer’s website if you encounter any model-specific issues.
As technology continues to evolve, USB booting remains an essential skill for both casual users and IT professionals in Australia. Whether you’re troubleshooting a system issue, installing a new OS, or exploring alternative computing environments, the ability to boot from USB opens up a world of possibilities for your Windows 11 PC.
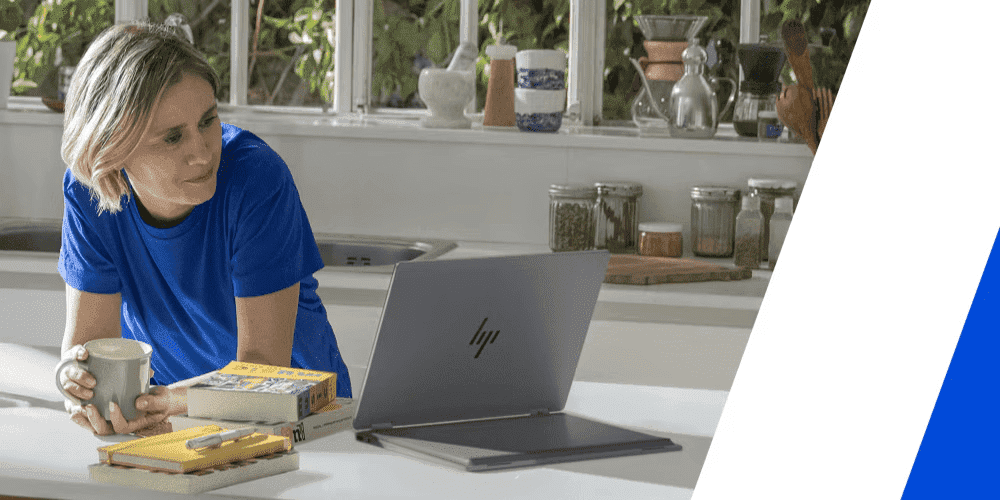
If you’re in the market for a new laptop that supports USB booting, consider the HP Pavilion Plus 14 inch Laptop 14-ew0009TU. With its powerful Intel® Core™ i7 processor and versatile ports, it’s perfect for advanced computing tasks and USB booting.
For those needing a desktop solution, the HP Desktop M01-F3000a Desktop PC offers reliable performance and multiple USB ports, making it ideal for various bootable media applications.
By mastering USB booting on your Windows 11 PC, you’ll have a valuable tool at your disposal for managing, maintaining, and getting the most out of your computer. Happy booting, Australia!
Recent Posts


Popular Posts


Products purchased through this store are sold and fulfilled by Ingram Micro Pty Limited
CONTACT US
Call us
- Sales
- 1300 540 516
- Technical support
- 13 23 47
Exc. public holidays
Chat with us
- Our specialist are here to help
- Live Product Demo
- Sales
- 61288061500 (WhatsApp)
-
- Post Sales
- 61288061700(WhatsApp)
Exc. public holidays
Live product demo
Submit feedback
We value your opinion!