
Follow the steps listed below to print the PQ troubleshooting pages.
These pages consist of one procedure page, five color test pages, one configuration page, and two Diagnostics pages.
- Print a copy of this Web page, and walk over to the printer you are troubleshooting.
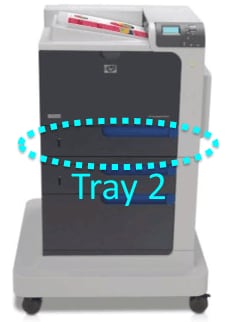
- Load either 8.5 x 11-inch paper (letter) or A4 in Tray 2
 of your printer.
- Press the Menu button
 to enter the MENU on the control panel of the printer.
- Press the Down arrow button
 to highlight the DIAGNOSTICS menu.
- Press the OK button
 to select the DIAGNOSTICS menu.
- Press the Down arrow button to highlight the PQ TROUBLESHOOTING.
- Press the OK button to print the pages.
- The message PRINTING... PQ TROUBLESHOOTING displays on the control panel until the printer finishes printing the PQ troubleshooting pages. The printer returns to the Ready state, after printing the PQ troubleshooting pages.
- Pick up the PQ troubleshooting pages.
- Return to your computer to continue the troubleshooting procedure.

![]()
Please let HP know if this helped you to resolve your issue, and help HP improve service.
![]()