Taking screenshots on your HP laptop is an essential skill for work, education, and personal use. Whether you need to capture important information, share something interesting, or document an issue, knowing how to take a screenshot on your HP laptop can make your digital life much easier. This comprehensive guide covers multiple methods to take screenshots on any HP laptop model, including the HP Envy, HP Elitebook, and other popular series.
Screenshots have become an indispensable tool in our digital age, allowing us to capture and preserve important moments, share information effectively, and communicate visually with others. For HP laptop users, understanding the various screenshot methods available can significantly enhance productivity and make daily tasks more efficient.
Why Take Screenshots on Your HP Laptop?
In today’s digital workplace and educational environment, the ability to capture what’s on your screen has become increasingly important. Screenshots serve numerous essential purposes that make them invaluable for both professional and personal use. Here are the key reasons why mastering screenshot techniques on your HP laptop is crucial:
- Document important information for future reference, such as confirmation numbers, receipts, or important conversations
- Share visual instructions with colleagues or friends to explain complex processes more clearly
- Capture error messages for technical support, making troubleshooting more efficient
- Save online receipts and confirmation pages for your records and warranty claims
- Create detailed tutorial guides with visual elements for training purposes
- Record important moments during video calls or webinars for later review
- Save social media posts or temporary content before they disappear
- Quickly capture text that can’t be copied due to restrictions or formatting
- Document software issues for troubleshooting and bug reporting
- Create visual presentations and reports with actual screenshots for better clarity
Understanding these applications helps you choose the most appropriate screenshot method for your specific needs. Let’s explore the various ways to capture screenshots on your HP laptop, starting with the most basic method.
⚡ Recommended Solution - High-Resolution Screenshot Display
Crystal Clear View!
HP E24 G5 FHD Monitor
- Full HD (1920 x 1080) for crisp screenshot review
- IPS panel for accurate color reproduction
- 5ms response time for smooth editing
Full HD resolution | IPS panel | 5ms response time
Method 1: Using the Print Screen (PrtSc) Key
The Print Screen key is the most fundamental and traditional way to take a screenshot on your HP laptop. This method has been available since the early days of Windows and remains one of the most reliable ways to capture your screen. Located on your keyboard, usually in the upper-right section, the Print Screen key might be labeled as “PrtSc,” “PrtScn,” or similar variations.
Full Screen Capture
Taking a screenshot of your entire screen is the most basic function of the Print Screen key. Here’s a detailed walkthrough:
- Locate the Print Screen (PrtSc) key on your keyboard (usually in the upper-right corner)
- Press the PrtSc key once to capture the entire screen
- Open an image editing program like Microsoft Paint
- Press Ctrl + V to paste the screenshot
- Save the image in your desired format (PNG recommended for best quality)
Active Window Capture
Sometimes you only want to capture the specific window you’re working in, rather than the entire screen. This is particularly useful when you want to share a specific application or document:
- Click on the window you want to capture to make it active
- Press Alt + PrtSc to capture only the active window
- Open Paint or another image editor of your choice
- Paste the screenshot using Ctrl + V
- Save the screenshot to your computer in your preferred format
Important Note: If the PrtSc key doesn’t seem to work on its own, try pressing the Fn key + PrtSc combination, as some HP laptop models require this additional step due to their keyboard layout and design.
Method 2: Windows + Print Screen Shortcut
For those who prefer a more streamlined approach to saving screenshots, Windows offers a built-in shortcut that automatically saves your screenshots without requiring additional steps. This method is particularly useful when you need to take multiple screenshots quickly:
- Press the Windows key + PrtSc simultaneously
- Your screen will briefly dim to indicate a successful capture
- Find your screenshot in the Pictures > Screenshots folder
- The file saves automatically as a PNG image
The advantage of this method is that it eliminates the need to paste the screenshot into an image editor, as Windows automatically saves it for you. The screenshots are numbered sequentially, making it easy to keep track of multiple captures.
Method 3: Using the Snipping Tool
The Snipping Tool is a versatile built-in Windows application that offers more flexibility and control over your screenshots. It’s particularly useful when you need to capture specific parts of your screen or want to make quick edits to your screenshots:
- Type “Snipping Tool” in the Windows search bar
- Open the Snipping Tool application
- Click “New” or press Ctrl + N
- Choose your snip type:
- Rectangular Snip: Draw a rectangle around the area you want to capture
- Free-form Snip: Draw any shape to capture an irregular area
- Window Snip: Capture a specific window with a single click
- Full-screen Snip: Capture the entire screen
- Select the area you want to capture by clicking and dragging
- Edit the screenshot using the built-in annotation tools
- Save the image to your preferred location
The Snipping Tool also offers basic editing features such as highlighting, pen tools, and the ability to erase parts of your screenshot before saving.
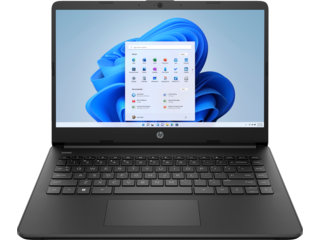
14" HD display
Intel® UHD Graphics
Windows 11 Home
Ideal for basic screenshots
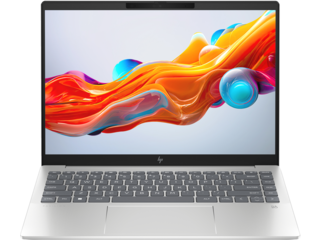
14" WQXGA display
AMD Radeon™ Graphics
16GB memory
Perfect for detailed captures
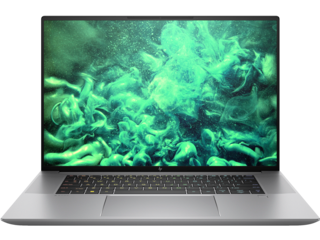
16" WUXGA display
NVIDIA® RTX™ 4070
64GB memory
Professional-grade quality
HP ZBook Studio
$7,146.00
Method 4: Snip & Sketch (Windows 10 and 11)
Snip & Sketch is Microsoft’s modern replacement for the traditional Snipping Tool, offering enhanced features and a more streamlined interface. This tool is particularly useful for users who need to annotate or mark up their screenshots:
- Press Windows key + Shift + S to activate Snip & Sketch
- Your screen will dim and a small toolbar will appear at the top
- Choose your preferred capture mode:
- Rectangular: Draw a rectangle to capture a specific area
- Free-form: Draw any shape to capture an irregular area
- Window: Capture a specific window with one click
- Full-screen: Capture everything on your display
- Select the area you want to capture
- Click the notification that appears in the lower-right corner
- Edit your screenshot with various annotation tools:
- Ballpoint pen
- Pencil
- Highlighter
- Ruler
- Touch writing
- Save the image or share it directly from the app
Method 5: HP’s Built-in Screenshot Tools
Many HP laptops come equipped with additional screenshot capabilities specifically designed for HP users. These tools often provide enhanced functionality and integration with HP software:
- Look for the camera icon on your function keys (often F12)
- Press the function key with the camera icon
- If available, use HP’s screen capture software
- Save your screenshot using the provided options
Some HP models may include additional software like HP Support Assistant or HP Documentation, which might offer additional screenshot capabilities or integration with HP’s support services.
Advanced Screenshot Tips for HP Laptop Users
To ensure you’re getting the most out of your screenshot capabilities, consider these advanced techniques and best practices. Understanding these tips can help you capture better quality screenshots and manage them more effectively:
Keyboard Shortcut Reference
Having a quick reference for keyboard shortcuts can save time and make the screenshot process more efficient:
- PrtSc: Capture full screen
- Alt + PrtSc: Capture active window
- Windows + PrtSc: Save full screen automatically
- Windows + Shift + S: Open Snip & Sketch
- Fn + PrtSc: Use on laptops with function key requirement
- Windows + Alt + PrtSc: Capture active window and save automatically
Best Practices for Taking Screenshots
Creating high-quality, professional-looking screenshots requires attention to detail and proper preparation:
Clean up your desktop before capturing:
- Remove unnecessary icons
- Close irrelevant windows
- Hide personal or sensitive information
Optimize your display:
- Adjust screen brightness for optimal visibility
- Set appropriate zoom level
- Ensure text is clear and readable
Use appropriate capture methods:
- Choose the right tool for your specific needs
- Consider the final use of the screenshot
- Select appropriate file formats
Organize your captures:
- Create a logical folder structure
- Use descriptive file names
- Implement a consistent naming convention
Protect sensitive information:
- Review screenshots for personal data
- Blur or redact confidential details
- Double-check before sharing
Maintain quality:
- Use PNG format for clearest images
- Avoid unnecessary compression
- Maintain original aspect ratios
Consider annotation needs:
- Add arrows or highlights when needed
- Include explanatory text
- Use consistent styling for marks
Troubleshooting
Common issues you might encounter when taking screenshots on your HP laptop, along with their solutions:
Print Screen Key Not Working
- Check if Fn lock is enabled or disabled
- Verify keyboard drivers are up to date
- Test alternative keyboard shortcuts
- Restart your computer
- Check if the key is physically damaged
Screenshots Not Saving Properly
- Confirm storage location settings
- Check available disk space
- Verify user permissions
- Test different save locations
- Check Windows clipboard functionality
Blurry Screenshot Output
- Check display resolution settings
- Ensure proper scaling settings
- Update graphics drivers if necessary
- Verify monitor refresh rate
- Consider using PNG format instead of JPEG
Screenshot Tools and Software
For users who need more advanced features than what’s built into Windows, several third-party tools offer enhanced functionality:
Professional Screenshot Applications
- Snagit: Advanced editing and capture features, screen recording
- Greenshot: Open-source with powerful annotation tools
- ShareX: Extensive sharing capabilities and workflow automation
- Lightshot: Simple interface with quick editing features
Cloud Storage Options
- OneDrive automatic upload
- Google Drive sync
- Dropbox screenshot folder
- iCloud for Windows users
These tools often provide additional features such as:
- Scrolling captures for long pages
- Video recording capabilities
- Advanced editing tools
- Direct sharing to social media
- Cloud storage integration
- Custom keyboard shortcuts
FAQ
Basic Screenshot Operations
How do I take a quick screenshot on my HP laptop?
Press the Windows key + PrtSc to instantly save a full-screen screenshot to your Pictures > Screenshots folder.
Where are my screenshots saved by default?
Screenshots are automatically saved in the Pictures > Screenshots folder when using Windows + PrtSc. Other methods require manual saving.
How can I screenshot without using the Print Screen button?
Use Windows + Shift + S to open Snip & Sketch, or access the Snipping Tool through the Start menu.
Advanced Features
How do I capture a scrolling screenshot?
Windows built-in tools don’t support scrolling screenshots. Use third-party software like Snagit or ShareX for this functionality.
Can I edit screenshots after taking them?
Yes, use Snip & Sketch’s built-in tools or open the screenshot in Paint. For advanced editing, consider dedicated screenshot software.
How do I set up custom screenshot shortcuts?
While Windows default shortcuts are fixed, most third-party screenshot tools allow custom keyboard shortcuts.
Technical Concerns
Why do my screenshots appear blurry?
This often relates to display scaling settings or file format. Use PNG format and check your display settings in Windows.
How do I capture high DPI screenshots?
Set your display to native resolution and use PNG format. Some third-party tools offer specific high DPI capture options.
Why can’t I screenshot certain applications?
Some programs, especially games or secure applications, may block screenshots. Try windowed mode or alternative capture methods.
Conclusion
Taking screenshots on your HP laptop doesn’t have to be complicated. Whether you prefer the simple Print Screen method or need advanced features from the Snipping Tool, there’s a screenshot method that will work for your needs. Practice these techniques to find the one that works best for you, and remember to organize your screenshots effectively for easy access later.
Remember that different HP laptop models might have slightly different keyboard layouts or additional features, but these core methods will work across all HP laptops running Windows. If you’re having trouble with one method, try another – there’s always an alternative way to capture what you need.
Additional Resources
- HP Support website for model-specific information
- Windows Help documentation for screenshot features
- Online tutorials for advanced screenshot techniques
By mastering these screenshot methods, you’ll be able to capture and share content from your HP laptop quickly and efficiently, enhancing your productivity and communication capabilities.
About the Author
Tulie Finley-Moise is a contributing writer for HP® Tech Takes. Tulie is a digital content creation specialist based in San Diego, California with a passion for the latest tech and digital media news.


